Thursday, April 22, 2010

Adjusting Infiniti Focus on a Folding Camera

Vintage folding cameras usually have front element focusing. Over time, these may have been moved out of alignment.

The professional way to align the focus at infiniti is to use an autocollimator. There are other ways of aligning the focus using a second SLR as a collimator which is decribed here or here.

What you'll need:--Tiny screwdriver. My 1/16" screwdriver works, but its almost too big. --Magnifying glass or jewelers loupe (optional)
--Tripod (optional)
--Cardboard and Wax paper (or ground glass)

Steps (If you access to a piece of ground glass, you can skip step one.)

1. Wax paper can be used as a temporary substitute for ground glass. Cut a cardboard frame that will fit the base of the film gate. The cardboard provides some rigidity to the wax paper. Cut a piece of wax paper and tape it tightly against the frame.


2. The distance ring is attached through three small set screws. It is not the bigger screw which simply acts a stopping device when turning the focus ring. Unscrew the set screws and remove the distance ring. You can unscrew the front element all the way, but don't.


3. Mount the camera on a tripod. You'll need the camera to point at a faraway object. Place the camera in a shaded area and the subject to be bright so you can see the best. Out a window or and open door works well.

3. Open the back and tape the frame to the film gate.

4. Open the aperture to the widest setting. Open the shutter to "B" or "T".


5. Focus the lens. Use the jeweler's loupe to help determine best accuracy.


6. Replace the focusing ring and tighten the set screws.


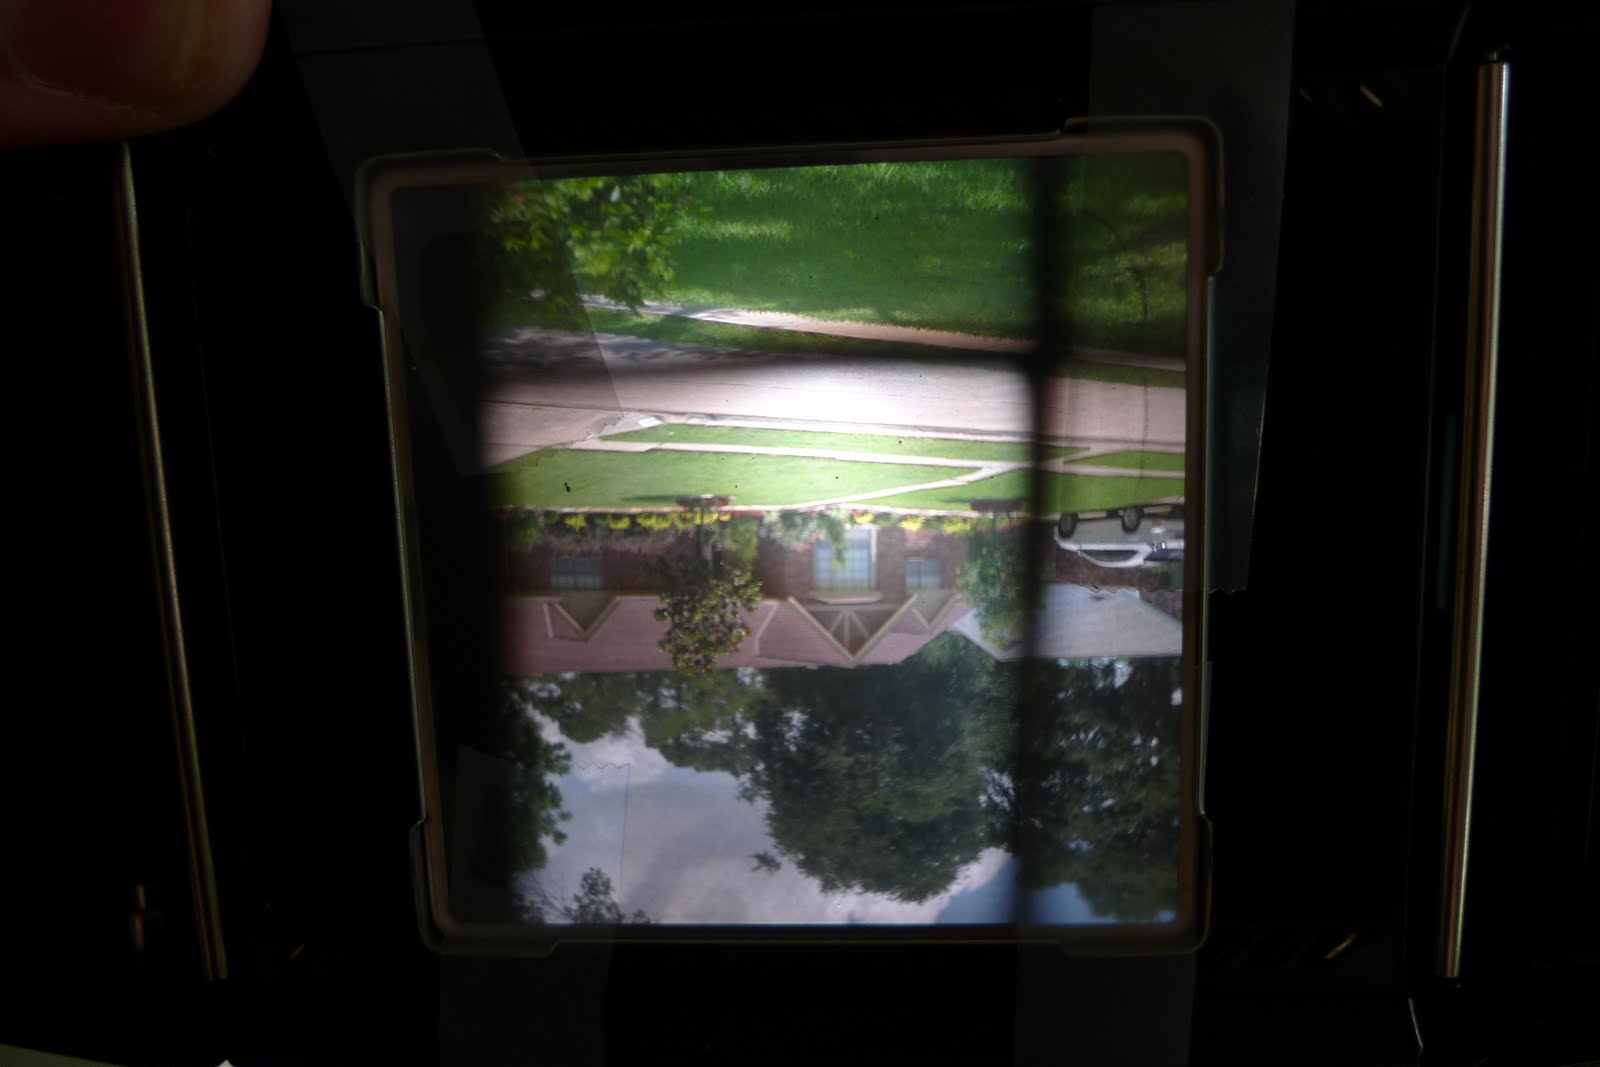
Of course, if you have a piece of ground glass, it makes determining focus the easiest. This is a Hasselblad focusing screen

Friday, April 2, 2010

Handmade Graflex

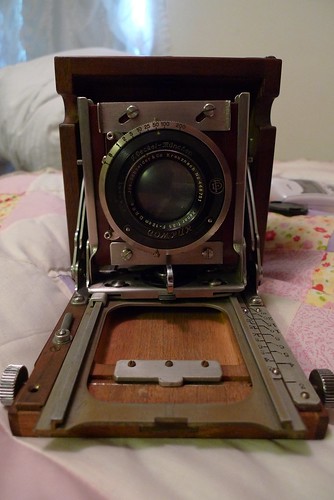
My grandfather built a camera back in the day. In the below picture, it is the one on the left. After doing some research, I found it is copy of a Graflex 2x3 Crown Graphic. It takes sheet film in 2 1/4 x 3 1/4 format.

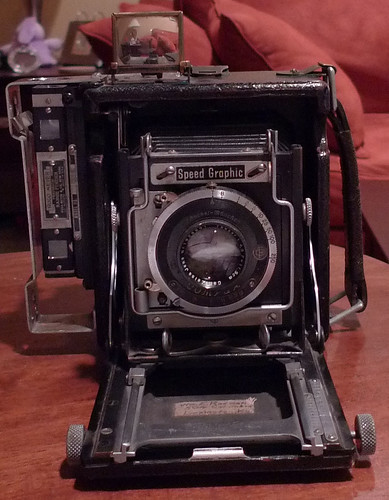
On the right, is a Graflex Miniature Speed Graphic. The Miniature Speed Graphic has a 11.5cm f/4.5 Carl Zeiss Tessar and the homemade camera has a 12cm f/3.5 Schneider Kreuznach Xenar. The lenses are roughly equal although the faster Xenar probably has a small edge. I got the Miniature Speed Graphic thinking it was the correct copy, but there is a minor difference.


The difference between the Speed Graphic and the Crown Graphic, is the Speed Graphic has a second focal plane shutter. There is also the Century Graphic which is the same as the Crown graphic, but with a plastic body. Many Graflex cameras, both the came with an accessory rangefinder. On the photo on the bottom left, the Miniature Speed Graphic, (looking at the rear right side) the levels and dials along the right for operating the focal plane shutter. The long metal attachment and tube is the rangefinder.

The focal plane shutter is really only needed if you attach a separate lens without its own leaf shutter. Alternatively, if you want a shutter speed faster than 1/250 Compur shutter maximum, then it also may be needed.

'

The front of the cameras look very similar. The Speed Graphic has the rangefinder on the left side and a view finder on top.


The rear of the camera is where you load the sheet film holder. You can focus on the ground glass. The homemade camera is constantly exposed and the Graflex has a hood that pops up.


So is the camera really handmade? My grandfather was a tool and dye maker, so he had the skills and access to the tools. He also had a nack and a talent for making things. The numbers on the distance scale are punched


Notice the machined distance scales on the Speed Graphic.


I haven't tried to use either camera with film yet, although I will soon as I have both 2 1/4" x 3 1/4" film and sheet film holders. Only Efke, a Croatian manufacturer, makes 2 1/4" x 3 1/4" sheet film, in black & white in three speeds - 25, 50, and 100.

Sunday, March 14, 2010

Developing Tri-X at 800

I wanted to use Tri-X 400 at ISO 800. Kodak says to develop at 800 the same times as 400 and only push process (extend developing times) if shot at 1600. This doesn't really make sense to me. Certainly there is some benefit to extending developing times a little bit. For 70F, D76 1:1, at ISO 400 its 9 minutes and ISO 1600, it could be a guessing game what the proper developing time should be without guidance from Kodak. Is the average appropriate?

I decided to graph the known developing times (400,1600,3200) and find the closest regression. Then I could find ISO 800 on the curve. I believe exposure and developing is really a log based scale, but Kodak rounds its developing times to the nearest quarter-minute. So for D76 1:1, I was getting better results (r squared values) with a power curve.

The results:

D76 stock 68F: 8 minutes 8 seconds
D76 stock 70F: 7 minutes 28 seconds

D76 1:1 68F: 11 minutes 25 seconds (11'38" with a log curve)
D76 1:1 70F: 10 minutes 38 seconds (10'45" with a log curve)

The charts:


How does it compare:

A pure average of the 400 and 800 times would give a slight increase in developing times of 5-10 seconds.

Wednesday, February 17, 2010

The Economics of Developing Your Own Black & White

The economics of developing your own black and white are very attractive. The way I see it, you can start developing for maximum of about $80 in fixed costs and then about $0.60 a roll after that. If you would otherwise pay for developing, at perhaps $7 a roll, the break even is after 13 rolls.

Developing is also fun and the turnaround time is much quicker.

Here's the breakdown of costs:

Fixed Costs

  • Tank System -Patterson tank system is cheap and easy - $23 new, but you likely can also find used gear.
  • Changing Bag - If you don't have a really dark room to unload the film, you need one of these. Get a big one as it makes life easier. - $30
  • Thermometer - you should already have one.
  • Storage Bottles - You can save milk bottles if you want reduce cost. I find official bottles with graduated markers to be useful.3 x $3 = $9
  • Scissors - everyone should have this
  • Bottle Opener - everyone should already have this
  • Squeege - $7 - but any semi-hard rubbery surface will do and you wipe off one size at a time.
  • Film Hanger - $3 - I also successfully use bag clips.
  • PhotoFlo - $8 - helps wisk water away. Add it to the final rinse. You need about 2 drops per 10 oz. With 600 drops per ounce, this pint size container will last a long time. I'm going to treat it as a fixed cost.

Variable Costs

  • Developer -D-76 $9 - One gallon of powder makes 128 fluid oz which is further diluted to 256 oz. Each reel needs about 16 fluid oz. So you get about 16 uses, which comes out to be $0.56 per roll.
  • Stop Bath - Kodak $6 - One pint concentrate bottle. Mix 3 ml per liter of dilution solution, and again apply about 10 oz of dilution solution. You get 533 uses per pint of concentrate. This is about $0.012 per roll. Or you can use tap water.
  • Fixer - Kodafix - $7 - One quart of concentrate makes one gallon of solution. You can reuse solution 120 times. This would technically work out to be over 1500 uses per quart of concentrate, but there is some attrition (you don't get 100% when you pour the fixer back in the bottle). If you can reclaim 99% of the solution, you'll get 250 uses, or $0.028 per roll.

Friday, February 12, 2010

Canon Canonet GIII QL 17

Back in the 1960s and 1970s Canon made a serious of consumer grade, manual focus, fixed lens rangefinders, branded the Canonet. Released in 1972, the long named, GIII QL17 was final evolution of the Canonet. The camera has achieved a bit of a cult status. It sold new for $94 then ($412 today), but now can resell for about $140 from a dealer, like keh.com. It can be found on eBay for cheaper but you likely risk it not working. The following sites can provide a lot of the technical detail:

Photoethnography
Favorite Classics
CameraQuest

The upside:
--Sharp, fast, 40/1.7 lens.
--Aperture priority and manual override.
--Small and portable

The downside:
--It takes an outdated mercury battery.
--The foam light seals have degraded over the last 40 years.
--Fixed lens

The Verdict:
The camera is great for someone looking for a film camera to give it a try. Don't be surprised if you want to try another lens and are quickly looking for . I took one roll and quickly wanted one with an interchangable lens.


The Camera:
The Camera:


The Photos:
Downtown Houston with Kodak TMAX 100:


Saturday, February 6, 2010

Voigtlander Nokton 50/1.5 Review

The Voigtlander Nokton 50mm f/1.5 (made by Cosina), is a sharp, fast lens that is not excessively large. We buy fast lenses for their speed, and this lens performs great wide open. Some complain about the quality of the out-of-focus area, but I think it good. You'd have to spend 10x the money to get an incremental improvement in quality (Leica Summilux 50/1.4)

at f/1.5, Portra 400NC:


either f/1.5 or f/2, Portra 400NC:


either f/1.5 or f/2, Ultra Color 400:


f/1.5-f/2, Portra 400NC:


More photos here:

Fuji film reviews

I normally have been a consistent user of Kodak films, but I've been branching out based on curiosity and need.


Neopan 1600:
High contrast, high speed, modest grain. Great for more artistic photos.


Superia 1600: While I really like Kodak's Portra 400, I was underwhelmed with Portra 800 I decided to give the Fuji 1600 a try.

The grain at 1600 is about equal to Portra 800, and the color balance is much better.


Fuji Pro 800Z - A high quality high-speed film. In 35mm format, it results in very light grain and good colors. Regarding 120 format, the larger size of the negative eliminates any noticable grain.


120 format: